A Ganymede in Three Sections – Kayak Plans
BY DAVID LARGE
After making a canoe, in a stich and tape design, I decided that I needed something that was more seaworthy. The canoe is fine for closed waterways and calm rivers but not really suitable for the River Thames. After looking at many options and plans I established that I need something that was, simple to build, was suitable for the River Thames and would fit in my workshop during construction. Finally, I needed to consider long term storage, weight and transport. Not an easy set of requirements to satisfy.
I quickly settled on a simple free on-line plan, Ganymede by Guillemot Kayaks. This is a simple flat-bottomed kayak with single plank sides, a flat rear deck and two-piece upper deck at the bow. The next stage will test my skills in woodworking and also design, or design adaptation.
I needed to make the Kayak in three pieces, which satisfy a number of the requirements and settled on a simple rear compartment, the central tub for me as paddler and a bow section. From the plans I made a scale paper model to visualise the craft, also seeing how it would look and if the sectional element would work.
The first scale model was made from printed A3 plans, this did indeed show me that I may be possible, next was a bigger model, using a scale of 1cm to the inch. This confirmed my initial thoughts. From this larger model I established the sizes of the sections. The rear approx. 54 inches, the tub 60 and the bow approx. 44 inches in length.
Next stage was proper full-size pans to work from. After lots of thought I found that you can buy “lining paper” that you would normally use in a house to prepare bad walls for painting. This could be bought in various weights, so I decided on a thick 2000g m2 paper. One 20 meter roll was bought and the next stage started, carefully transferring the design from plan to full size paper, not an easy task but with care and patience, all parts were drawn up and cut out.Image
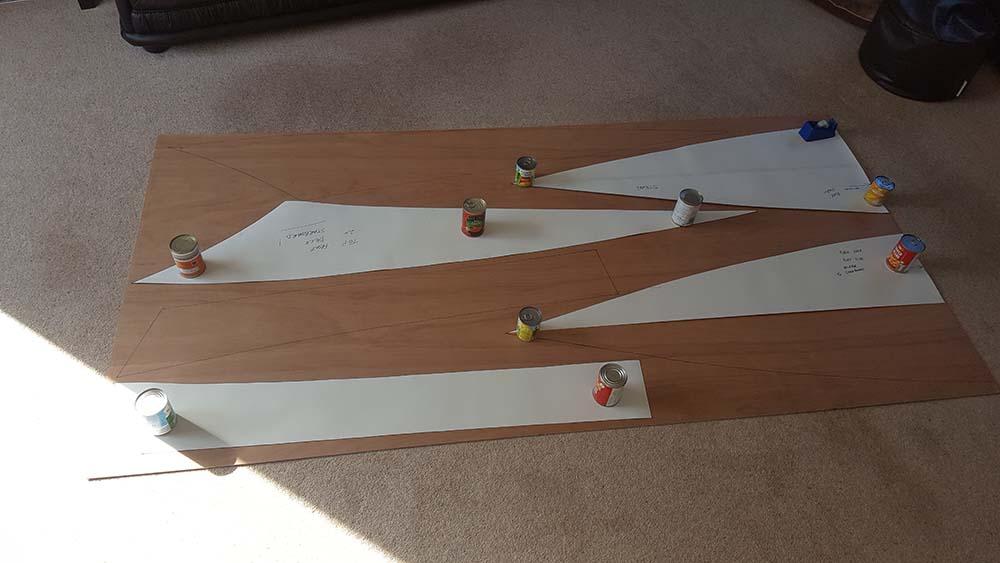
Three sheets of Suitable 3.8mm plywood were purchased and delivered by the local timber firm, lots of marking out ensued using the 3 section measurements as above, excess on the side planks was left to allow for the redesign!!
The stern was tackled first the base plate and two side planks were slowly and accurately cut any excess was sanded back to ensure smooth lines. The pieces were gaff taped together to test fit and design, then they were superglue stitched.
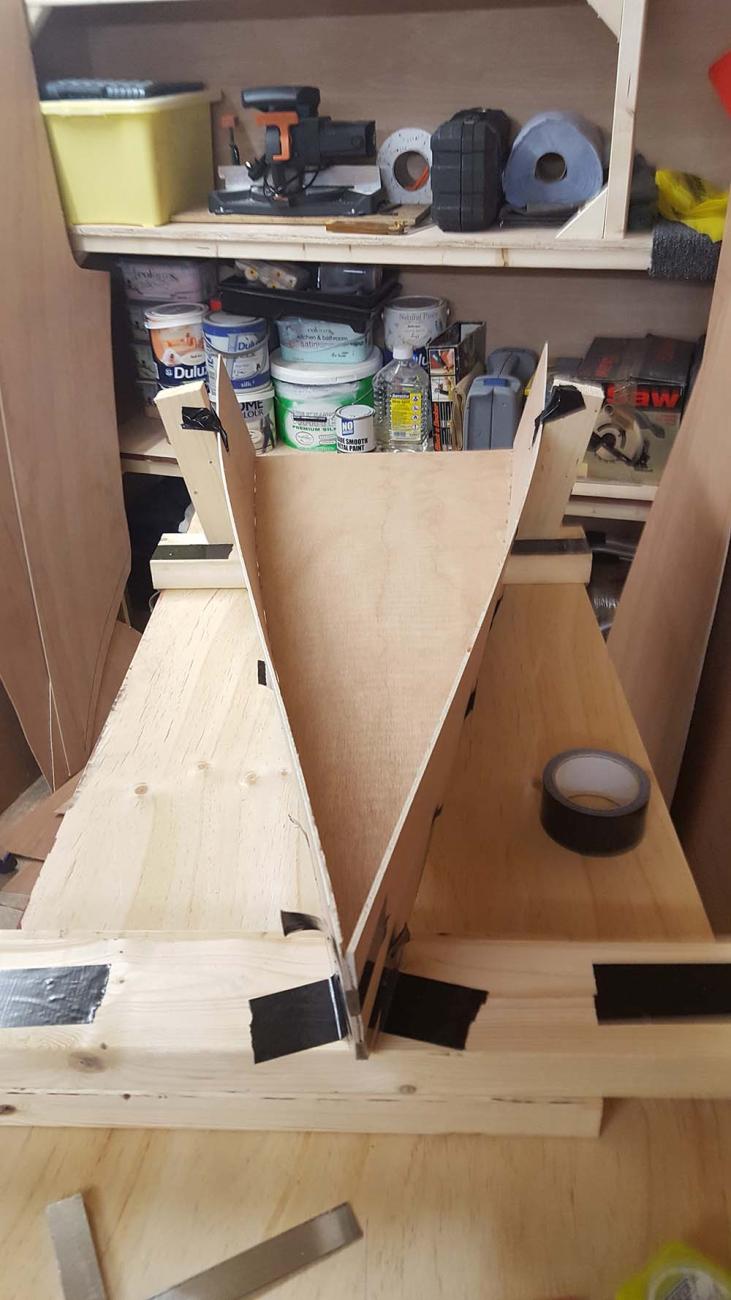
Now we were into the unknown, the rear stern section needed a bulkhead, this needs to fulfil and number of duties, creating the designed shape for the stern a place to sink “T nuts” for securing the stern to the tub. I believe for strength it needed to be at least 9mm thick, however I had some 12mm scrap shuttering ply, this would be fine for design and template purposes.
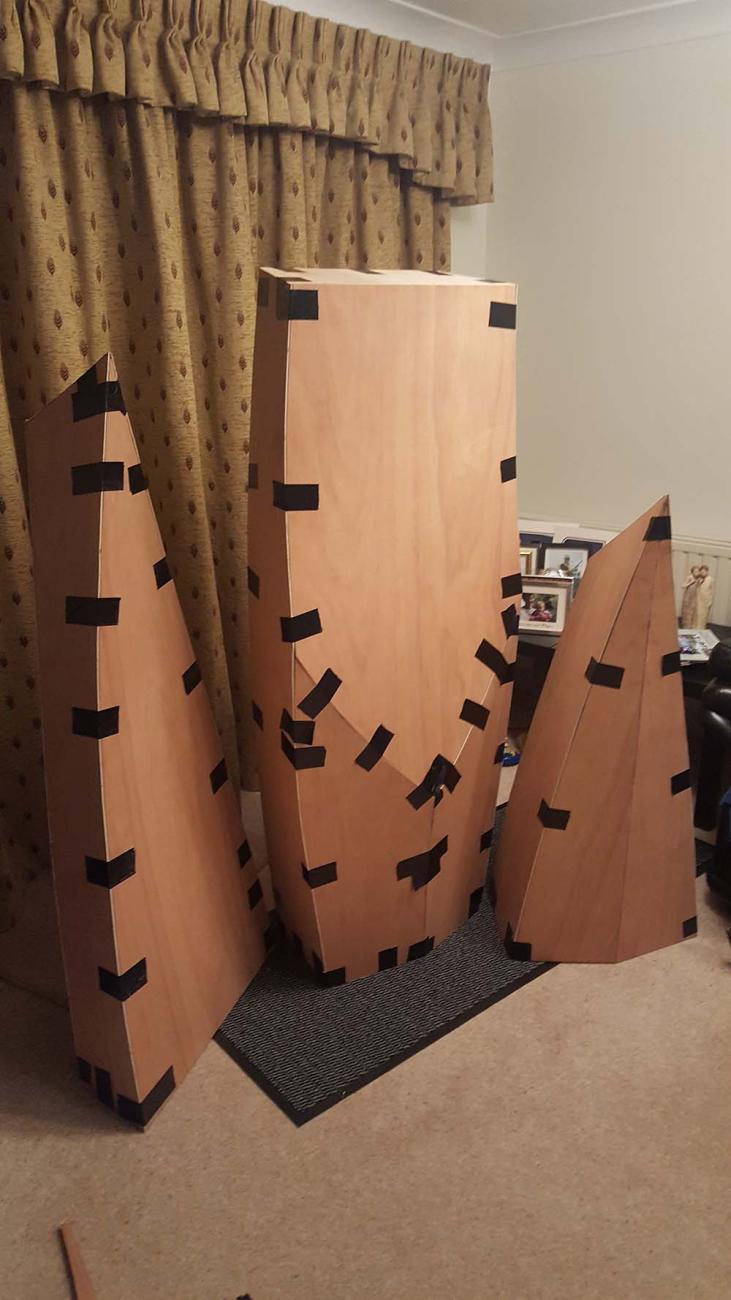
Two of the bulkheads were created, one with a width excess of approx. 1.5mm for use on the tub to allow for the curve as the stern section transitions to the tub, this will be fine tuned during the tub manufacture. The stern bulkhead was gaff taped into place and the stern deck test fitted, being temporarily held again with gaff tape.Image
Image
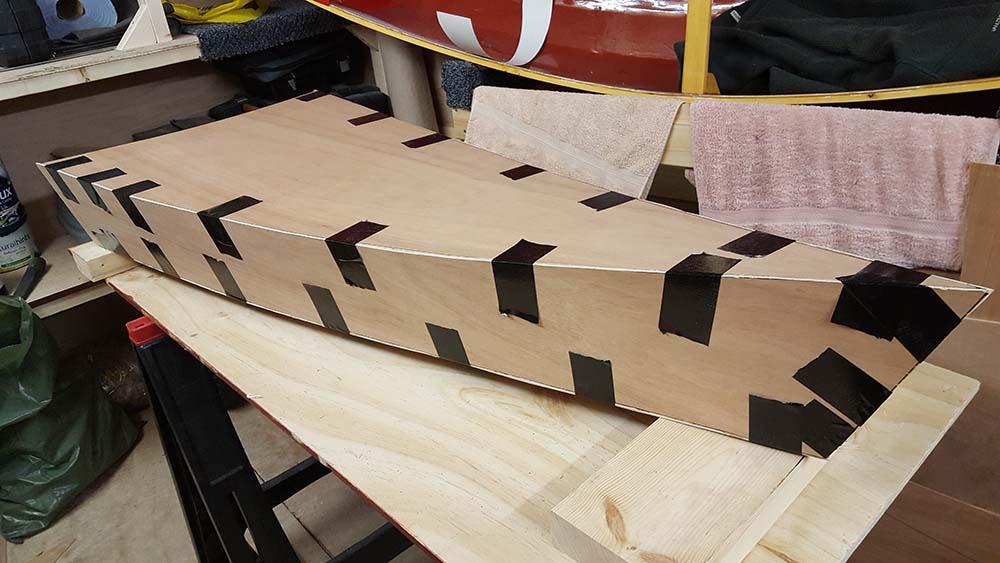
Attention now turned to the bow section, the same methodology has been used, the forward bulkhead shape and size established, final cutting of all tub pieces, including the main hatch hole in the large rear deck piece.Image
The bulkhead shapes and position have been established, strengthener plates have been added as TNuts are needed in them to secure the sections together with standard A2 Stainless flange bolts 50mm in length with a penny washers.
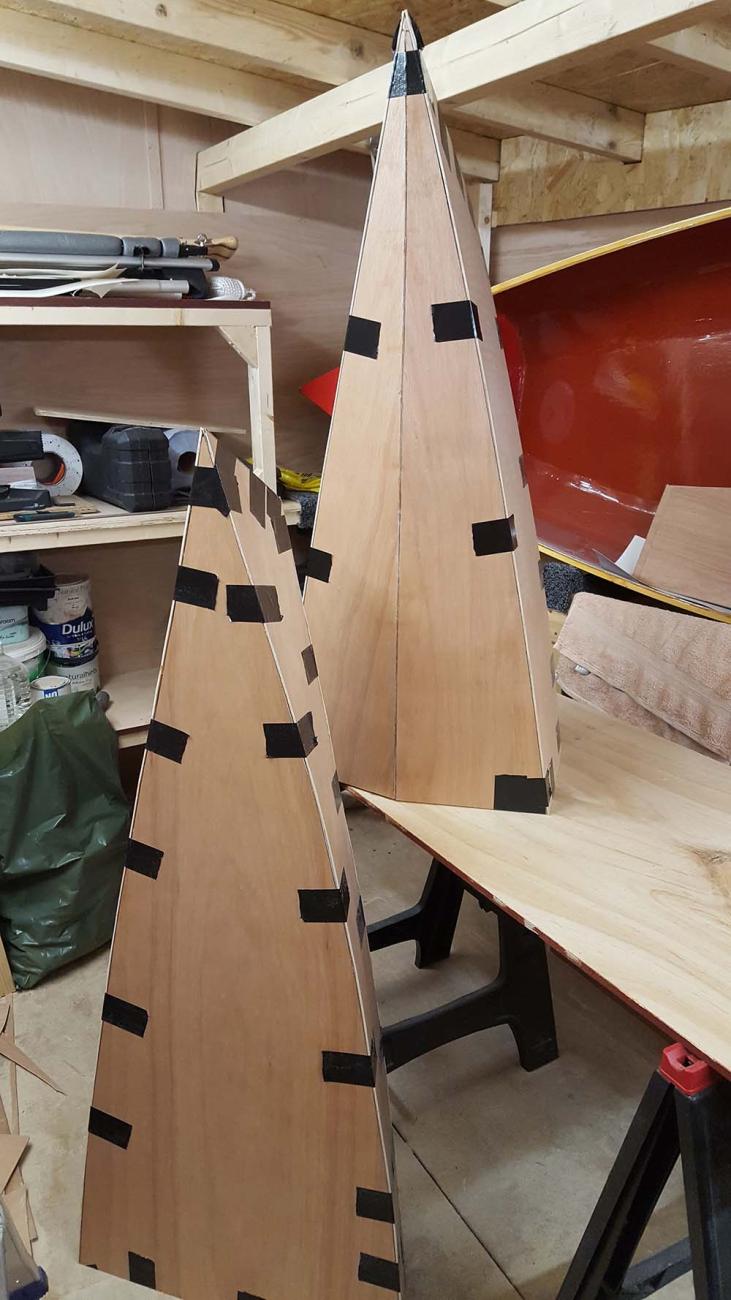
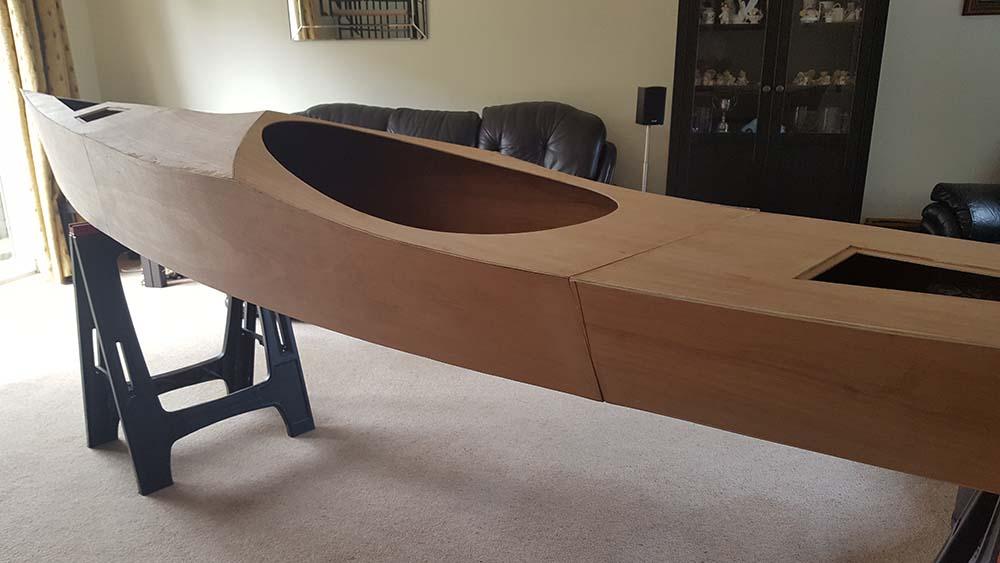
Next a full trial fit of all sections was needed, the bulkheads were clamped and drilled so that all holes would line up, they were then taped into the bow, stern and central tub, careful assembly then was undertaken and all double checked for fit and panel positions etc. thankfully everything looked good.Image
Image
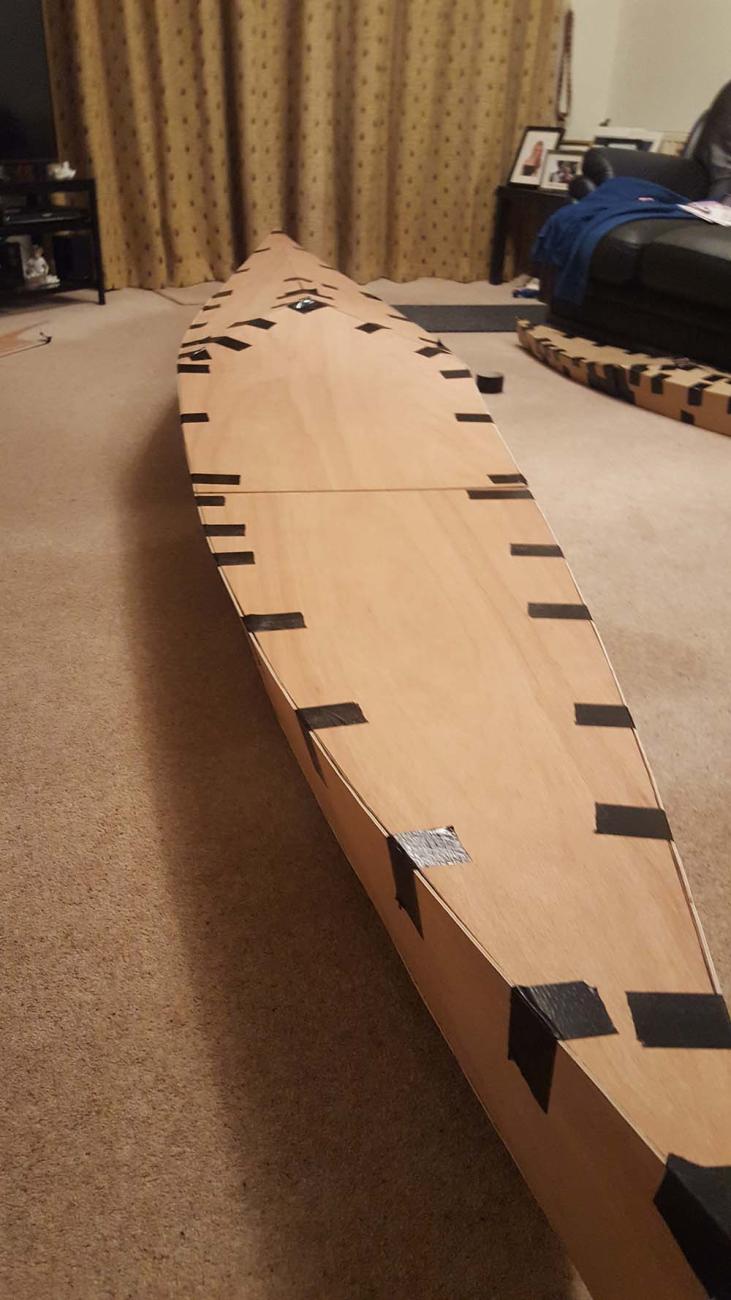
NOW FINAL ASSEMBLY COULD BEGIN.
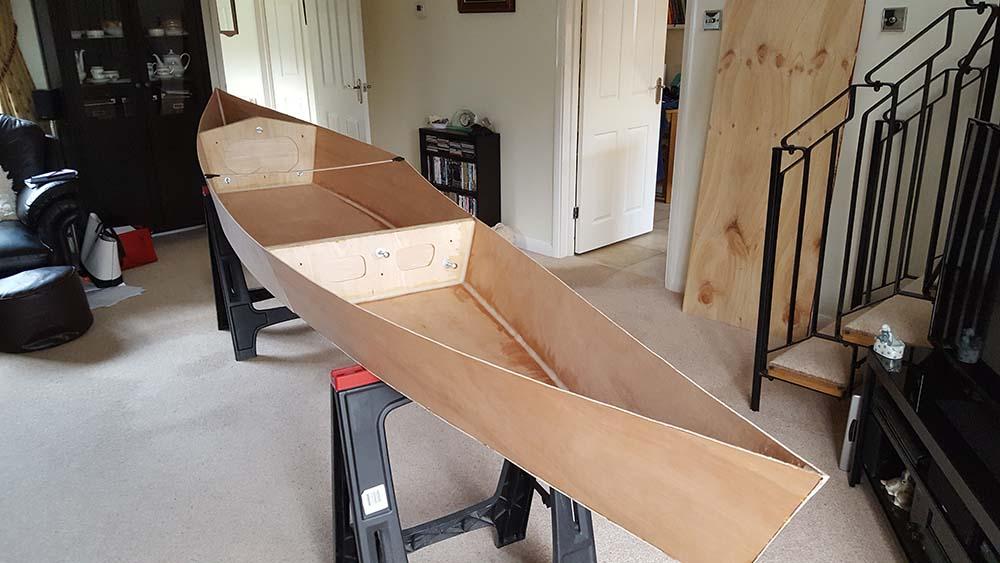
The bulkheads were then resined into place, then a further final check was made.Image
Image
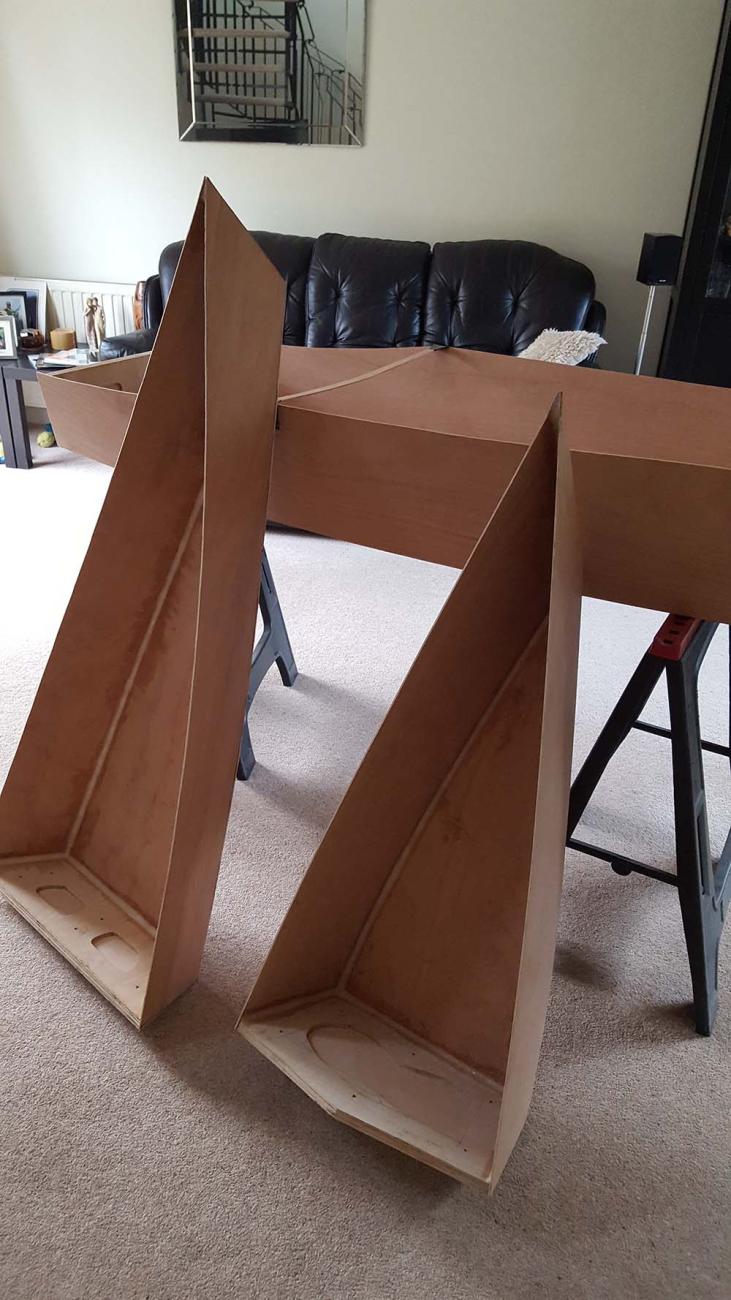
Everything was looking good and starting to take shape
Then and only then could the section deck top pieces be fitted, resin and taped into position. Access holes have been cut into the top panels to allow fitting (after they were internally cover in fibreglass twill), these will be filled in as the build progresses. The panels will be made a design feature.
With the deck top panels fitted the bow and stern could be strengthened by the pouring of resin into the end void, and this then curing into a solid piece, approx. 2/3 of a cup was poured into each end of the kayak.
Both bow and aft sections are to have tie points installed this is achieved by plates being resined into place with a further TNut inserted allowing 6mm threaded rod to be screwed in with a lifting eye then attached.Image
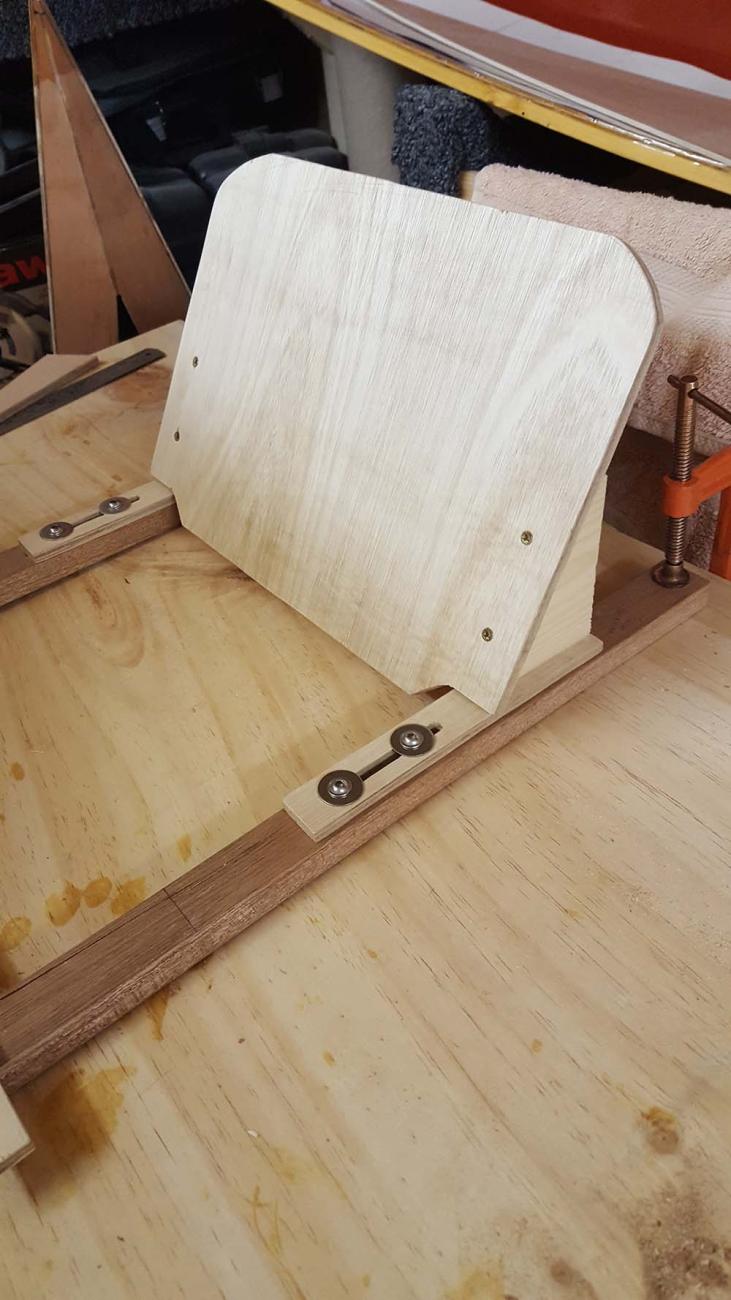
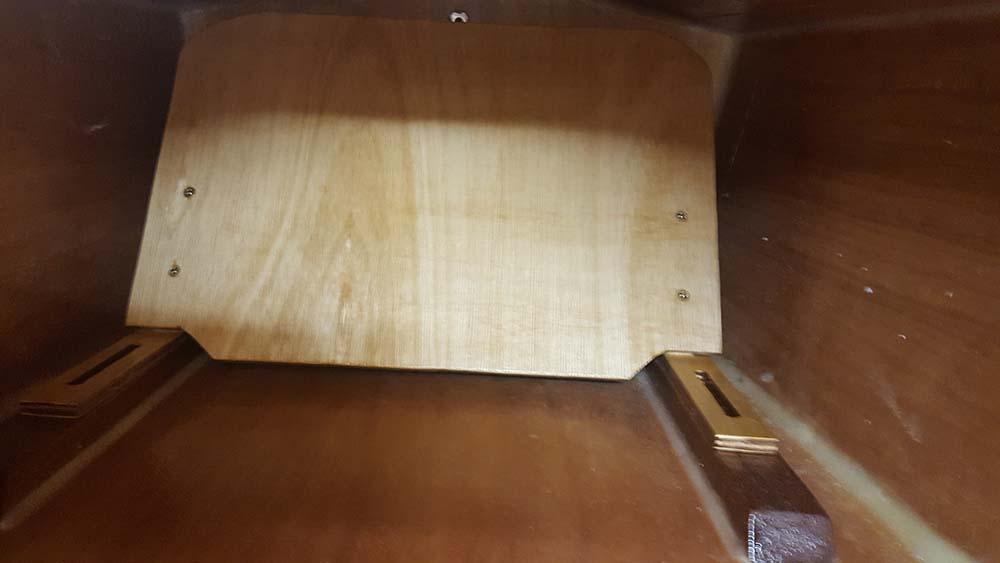
With the centre tub taking shape a foot rest was needed, this has been designed and integrated into the Kayak, again captive TNuts were used in the base timbersImage
Image
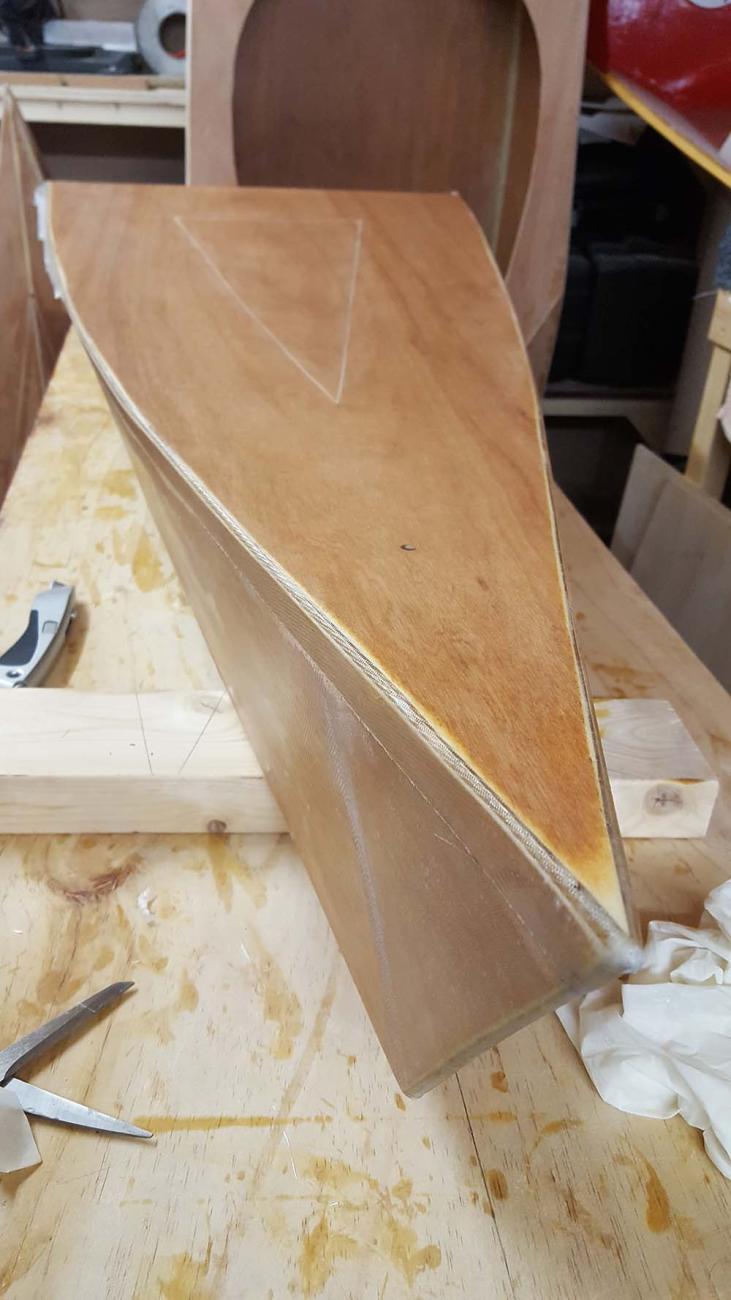
With deck tops in place, strip timber was resined in place to allow the access deck caps to be reinstated, the jigsaw blade gap then filled with a resin based filler and sanded back, then the exterior fibreglass twill has been attached with resin and the side joints neatly trimmed back to give a good clean line.Image
Image
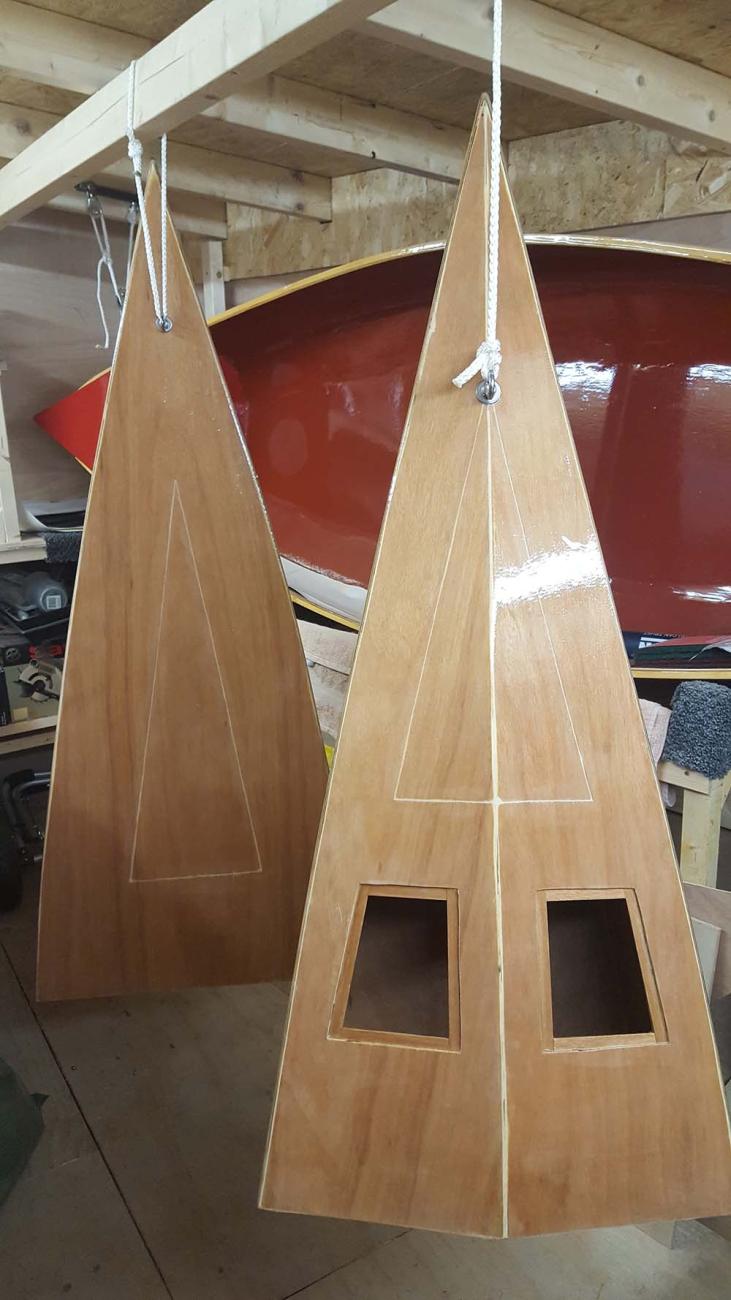
The bow and aft then received their final coat of resin to act as a filler base for the next stage. The bow section has two access ports for attaching the tub and bow together. A small cover fits in each side and a neoprene seal keeps it watertight.
The tub has had a “combing” created this has been made by laminating 3 pieces of ply together to form a plate for a wider top piece which will accommodate the splash deck that will be used. The final stages show it being resined to the centre tub.Image
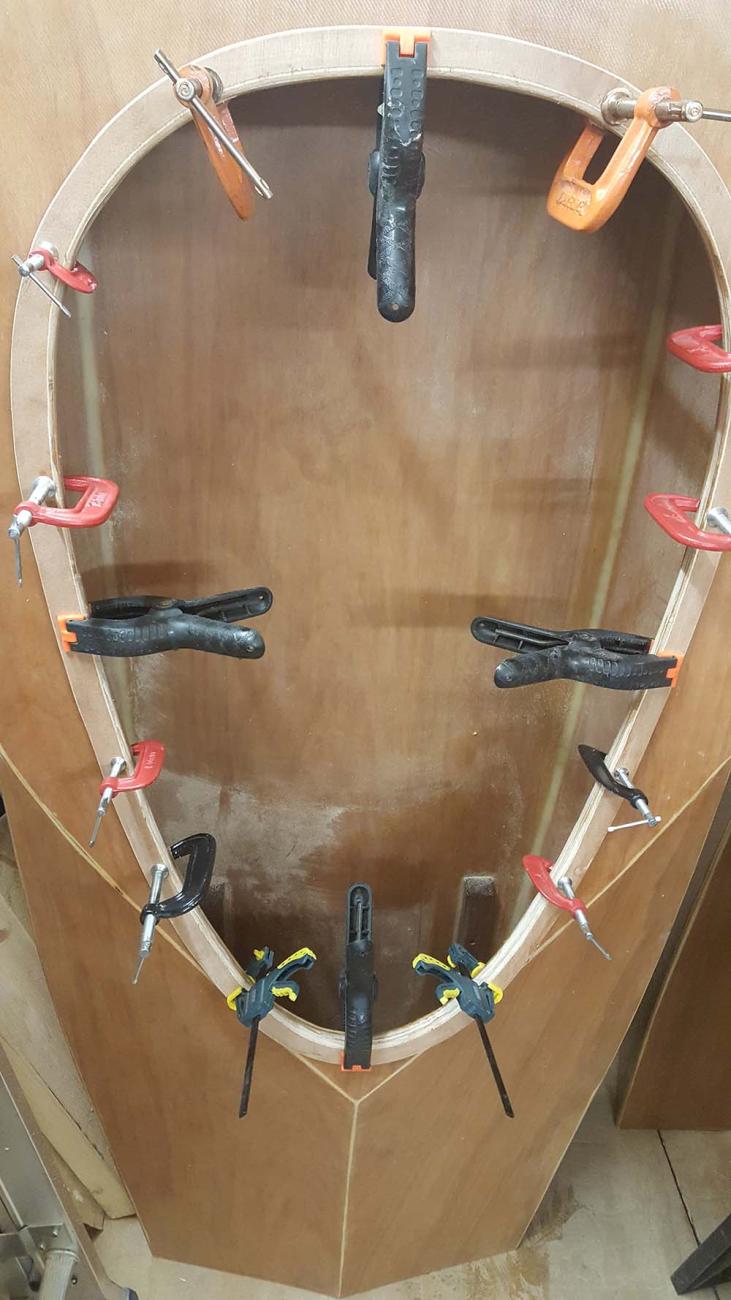
Image
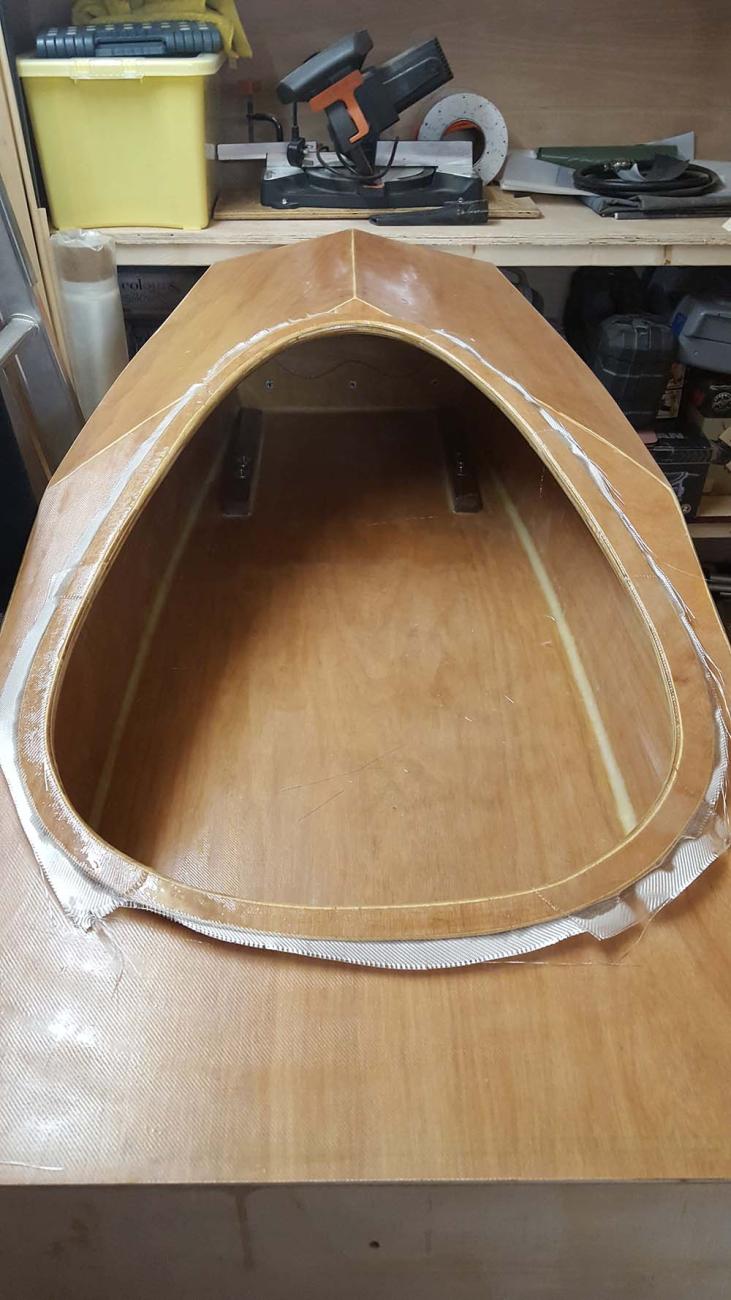
This was finished with a layer of glass fibre added over the top. The basic craft was now finished, now followed the rubbing back, varnish, seat construction, deck fittings etc.
The seat was made from 12mm ply a basic three part seat, base and hip sides, with a small backrest that all mounted to the base of the upper deck in line with the combing, the seat was then made “comfy” by adding a number of layers of closed cell foam and covering with 2mm neoprene.
Once the seat was installed the exterior could be finished, after much preparation many thin coats of Yacht Varnish were applied, each getting a light sanding for the nextImage
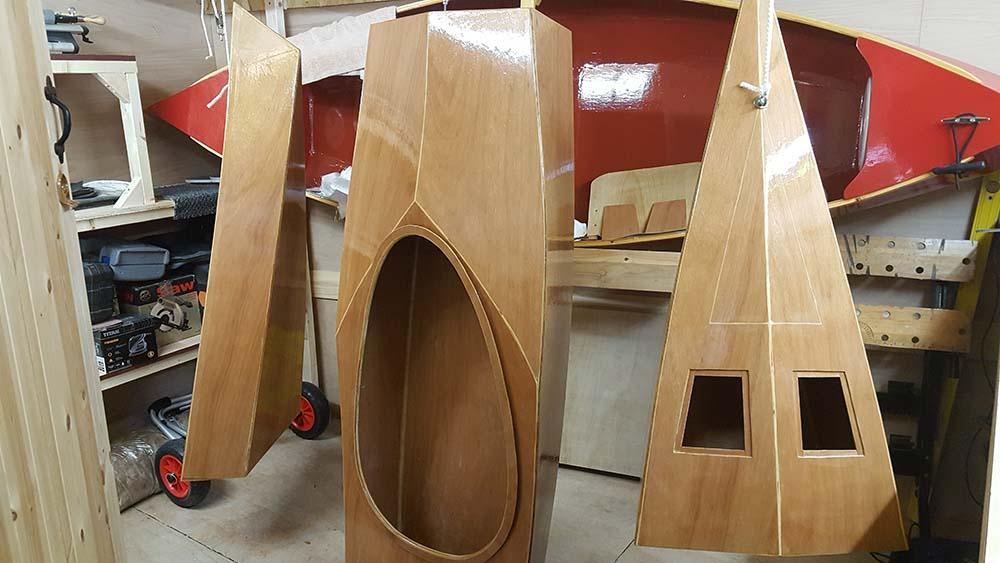
Now it was finished a final assembly was required to check all aspects
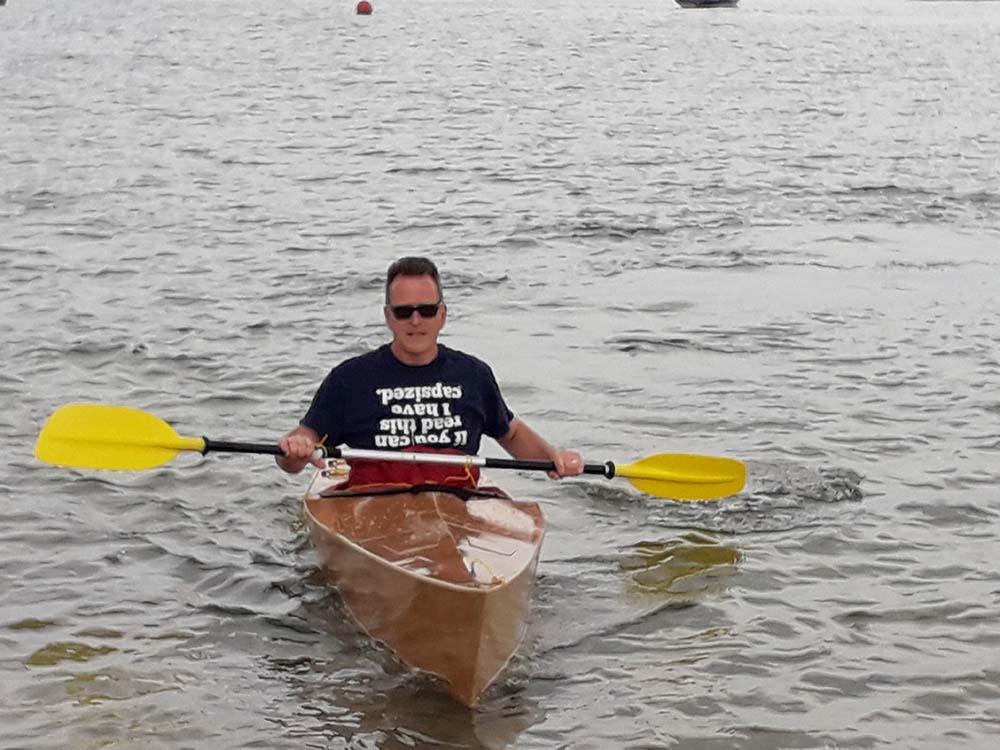
And Finally it got wet!
The initial sea trials were undertaken on a very calm day in shallow water and as can be seen from a short distance you would not know it comes as three pieces, there are no creaks or groans and it paddles true and well.Image
0 Response to "A Ganymede in Three Sections – Kayak Plans"
Post a Comment